Friday, September 21, 2012

Green Stuff Capes My Way- Mi Metodo Para Capas Con Masilla Verde

 Hey-o everybody! I'm back and I've got a pretty nice tutorial on here; so let's get on with it, shall we?
The first thing you're probably gonna want to do is decide where your cape is going to be fitted. It can come from the shoulders, neck, or even waist which is what I chose.

Next up you measure  how big you want it to be. At this point you want to decide how it's going to pose. It's not that hard to get it to look right, you can always clean it up later.

Hola a todos! Estoy de vuelta y tengo un tutorial bastante genial para ustedes, asi que comencemos!
Lo primero que van a querer decidir es donde se va a montar la capa. Puede caer desde los hombros, el cuello, o hasta de la cintura que fue lo que elegi esta vez.

A continuacion deben medir que tan grande quieren que sea. Es en este punto donde tambien se decide como va a posar. No es muy dificil que se mire correctamente, y se puede arreglar mas adelante, solo es de confiar en sus instinctons.

Tuesday, September 18, 2012

Blood Angels Black Reach- Captain / Capitan


My tip for the day- your main cutting tool should be a Stanley knife, not an X-acto type knife! Not only is it more secure, sharper, and have a thinner blade, it will also last you longer.

My consejo del dia- en lugar de depender de la cuchilla X-acto tanto, hazte un favor y consiguete una cuchilla tipo Stanley. No solo se asegura mejor, tiene mejor filo, y una cuchilla mas delgada, sino que ademas dura mas.

Saturday, September 15, 2012

Casco con Remaches- Riveted Helmet


http://www.chaos-dwarfs.com/forum/showthread.php?tid=6553

Este foro me ayudo a lograr hacer remaches en masilla verde. Obviamente es importante humedecerla antes de tratar de hacerlos, pero una vez que sale quedan muy bien. Lo mejor es que se pueden usar tubos huecos de diferentes diametros para hacerlos rapida y facilmente.

The board I linked to helped me find a solution to making rivets out of green stuff. Obviously it's important to moisten it before trying to make them, but once you press down they come out really well. The best part of it is that you can find hollow tubes of varying diameters to make them quickly and easily.

Blood Angels Plastic Chaplain Mk.II - Capellan Plastico de los Blood Angels Mk. II


Blood Angels Relic - Reliquia de los Blood Angels


Painted up a relic for my 6th ed games, I used a coin as a base because I didn't want to waste a plastic base.

Pinte una reliquia para los juegos de sexta y use una moneda para evitar desperdiciar una base plastica.

Saturday, September 8, 2012

Custom Venerabe Furioso

Hey guys, I'm back and I have a new camera! So let's get on with the show. As per the smarter format, first I show you shiny pics, then I bore you with the text-


Here we have a Venerable Dreadnought with a couple of simple conversions to turn it into a Furioso. All that was needed was a head from a Death Company Marine, the Blood Angels symbol from a Stormraven, and the same for the shin covers that come with the DC marine boxes. The biggest couple of things it has are the magnetized torso, the pinned legs and feet (it's not even glued down yet!), the bent feet since they wouldn't be flat, and the raised leg as per the guide on this thread:

http://www.bolterandchainsword.com/index.php?showtopic=161351

Finally, for the cables all that was needed was an appropriate sized copper wire with another appropriately gauged wire wrapped around, and voila! Be sure to get plastic covered wire just to be as sure as possible that rust won't ruin your paintjob.

Saturday, July 21, 2012

Tools of War


So I painted up the card case (black plastic, ugh) and gave it a nice metallic look with a little bit of highlighting on the letters. Wanted to make it look like something that's been out there, ya know? It's not perfect if you scrutinize it, but at any reasonable distance I think it looks well. It was easy enough to drill holes and thread a very thin wire to separate the cards by type, and I really recommend doing so, also I added a screw for stability, though I found the plastic axle to be very secure.


Next up is the Servo Skull tape measure.  I like how they designed the front teeth to be where you pull it out. One of my friends broke his dad's tape measure so I took it and fixed it up, and used sandpaper to give it a bit more grip on the lock. I took this one apart and used the same concept and it does make a difference.

I then proceeded to sand the whole thing minus some of the obviously metallic components because it was completely painted in mithril silver with a badab black finish (or the new citadel equivalents) and that didn't suit me. Inspired as I was by this post http://www.dakkadakka.com/dakkaforum/posts/list/9270/289929.page#4489706

in which as you can see, he kept the silver look, I painted up the cables and detailed the details.


After I started sanding I really liked the white of this plastic, seems to be nylon based, and first painted any acrylics, really your choice out here. Vallejo liquid metals copper, retouched any areas. Then a badab black wash, followed by the gryphonne sepia wash, and finally a bit of drybrush (though a bit thick this time) with vallejo light flesh. That last bit gives it the more realistic bone appearance and my friends in anthropology tell me that real bone has that kind of striping, so it's good in this case for the drybrush to go in one direction and still be a tiny bit wet.

Remember this is a bigger piece, so a bit of water spotting, weather, and everything should be visible and if you mess up a bit with the washes it's perfectly alright.


To give it an upgrade, I added up a ledsnake-laser combo I bought, since this is supposed to be a gaming tool, to check for line of sight. I think the led is a bit more useful here since it floods an area and is a more natural indicator of what is visible, especially in 6th ed. It's perfectly removable for the sake of convenience.

Monday, April 16, 2012

Old and improved!


After some feedback I decided to remodel the terminator from my last entry.

Friday, April 6, 2012

Scratchbuilds-

Hope everyone out there is doing alright! I've been a bit busy lately with some scratchbuilds- first off I wanted to put in a LED with battery in my Land Raider that I could easily replace, and though the obvious spot in the engine compartment was beckoning it wouldn't have been practical at all so I decided I needed to make a cylindrical turret for the storm bolter.

The next entry, I think, is much better since I got some practice with the first- the leg below the knee of one of my terminators was repositioned about a year ago and it came loose at some time, after much searching I decided to just replace it with a bionic one as any Techmarine would advice, and you can see the result. I decided to remove the thigh piece that was left and just went crazy with anything I could find, and the model looks less like it was tripping over something (you can find it in my earlier entries. I decided that since Terminator armour is tactical dreadnought armour, that I would put a similar sort of plate there for the greaves, and some details do call back to the styling of dreadies.

Until next time!


 For a second I thought to just copy the relevant part to fix it, but then I decided to improve the model instead.


Wednesday, March 21, 2012

Lib mk 2

I was kind of bored with the old bolter look and I decided to upgrade him so he'd look more like a psyker, and thus-


Thursday, March 15, 2012

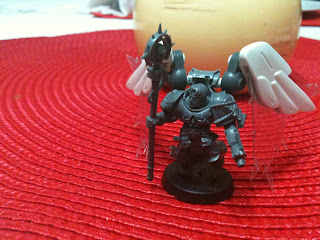
The wings, the eye, the blood, the grail, the spear

The rage! Only in 40k does a librarian conjure images of badassery. Yes, they are articulated.